Makeup Brush Set Buyer's Guide: Brushes and Tools
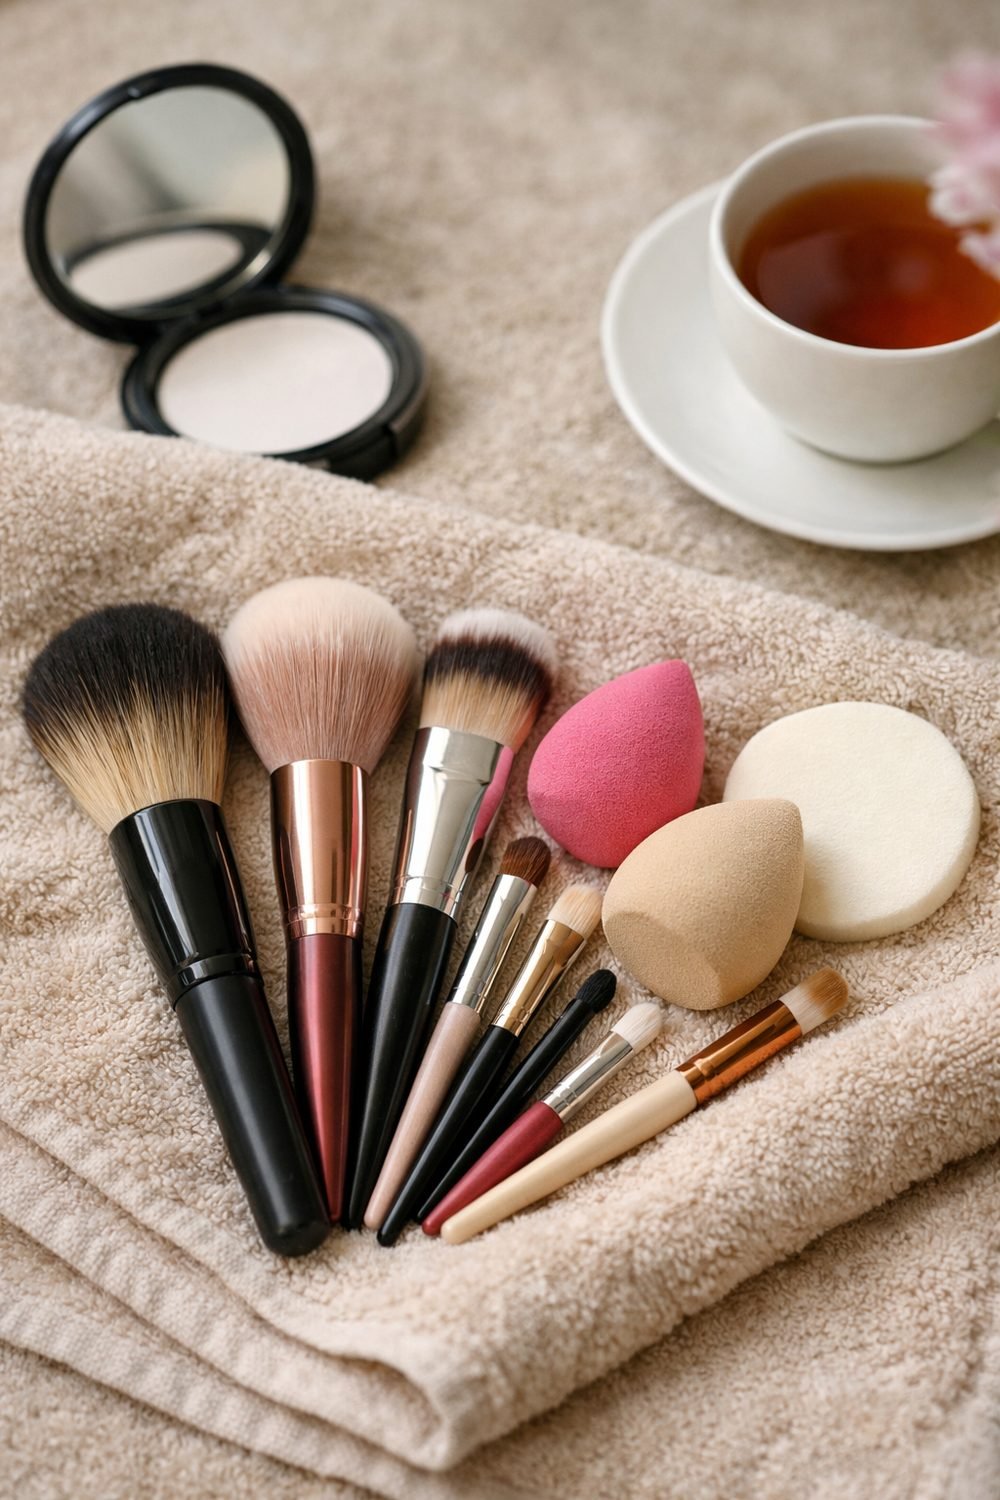
Choosing a makeup brush set can feel confusing when every kit promises something different. This guide explains bristle types, the brush shapes worth owning first, helpful extras like sponges, and how to care for your tools, so you can decide what to buy.
Good tools are easier to clean and last longer, whether you're eyeing a makeup brush set or a hot tools blowout brush. That's really the whole idea behind this guide. But "good" gets thrown around a lot in beauty shopping, so I want to show you what to actually compare when you're standing in a store aisle or scrolling a product page at midnight.
Cheap brushes can shed into your foundation within days, so check the bristles before you commit. It's easy to buy a pricey set and barely touch it, because half the brushes may be shapes you never need. Somewhere between those two mistakes I figured out what matters. This guide covers bristles, shapes, sponges, sets, cleaning, storage, and when to toss things. You don't need a drawer full of tools. You need a few that work and hold up.
Short on time? Our top picks: Real Techniques, EcoTools, e.l.f. Cosmetics and Sigma Beauty. See all picks
Quick summary
- Synthetic bristles work well for most people and most products, especially creams and liquids.
- Start with four or five brush shapes you'll actually use. Add more only when you notice a gap.
- Check the ferrule (the metal part) and the glue line. That's where cheap brushes fall apart.
- A big set isn't better value if you only use a third of it.
- Wash face brushes and sponges often, and always dry brushes lying flat or bristles down.
- Replace sponges much more often than brushes.
- Read the seller's page for bristle material and care instructions before you buy.
Synthetic or Natural Bristles?
This is the first question most people ask, and honestly, it used to be a bigger deal than it is now.
What synthetic bristles do well
Synthetic bristles are made from man-made fibers like nylon or similar materials. They don't soak up as much product, so liquid foundation and cream blush stay on your face instead of disappearing into the brush. They're also easier to wash and tend to dry faster.
Newer synthetic brushes tend to feel soft, and many people find they rival natural hair. Years ago they could feel scratchy or stiff, but that's changed a lot. For a beginner, I'd go fully synthetic and not think twice.
Where natural hair still shows up
Natural hair brushes are made from animal hair. Some people like them for powder because the hair has a slightly textured surface that picks up and spreads powder in a soft, diffused way. If you love that look, you might notice a difference.
The trade-offs: they usually need gentler washing, they can take longer to dry, and some people prefer to avoid animal products for personal reasons. If that matters to you, check the seller's page carefully. Words like "cruelty-free" or "vegan" should be stated clearly, not just hinted at with green packaging.
My honest take
Unless you're doing very specific powder work, synthetic is the easier choice. It's what I reach for every day.
The Brush Shapes Worth Owning First
There are so many shapes out there. Flat-top, angled, tapered, fan, duo-fiber, kabuki, stippling. It's easy to feel like you need all of them. You don't.
A simple starter lineup
- A foundation brush or a dense buffing brush. Flat-top or rounded, packed with bristles. Good for liquids and creams.
- A fluffy powder brush. Big and soft, for setting powder or a light dusting of bronzer.
- A blush or cheek brush. Medium size, slightly domed or angled.
- A flat eyeshadow brush. For packing color onto the lid.
- A fluffy blending eyeshadow brush. For softening edges in the crease.
That's it. With those five you can do a full face. If you wear brow products or liner, an angled brow brush is a good sixth.
Comparing two foundation brush styles
A flat paddle brush (the kind that looks like a small paintbrush) spreads product in strokes. It can leave streaks if you're not careful, but it's handy for precise spots.
A dense flat-top or round buffing brush blends in small circles or taps. It tends to give a smoother, more even finish with less effort. Most people I know who switched from a paddle to a buffing brush didn't go back. Many people don't either.
Shapes I'd skip at first
Fan brushes are fun, but I rarely use mine. Same with super tiny detail brushes, unless you're into graphic liner. Wait until you find yourself thinking, "I wish I had something for this." Then buy the thing.
Sponges, Puffs, and Other Little Tools
Brushes get most of the attention, but other tools pull their weight too.
Makeup sponges
A damp sponge, such as a beautyblender, gives a soft, skin-like finish with foundation and concealer. You press and bounce it rather than wipe. Sponges work well under the eyes, where a brush can feel a bit harsh.
The downside is they hold water and product, which means they need frequent cleaning and don't last forever. More on that later.
Powder puffs
Velour puffs press loose powder into the skin. They're cheap and great for setting under-eye concealer. A sponge is handy to keep in your bag for touch-ups because it doesn't make a mess like a fluffy brush does.
Lash curlers, tweezers, and sharpeners
These are the tools people forget to think about. A lash curler, such as one from Tweezerman, should fit the shape of your eye. If it pinches the corners, it's the wrong curve for you. Tweezers should close evenly at the tip. And if you use pencil liners or brow pencils, a sharpener that matches the pencil size saves a lot of frustration. Check what sizes it fits on the product page before buying.
Brushes vs sponges: which for foundation?
- Brush: faster, easier to clean, lasts longer, can give more coverage.
- Sponge: softer finish, great for sheer looks and under-eyes, needs replacing often.
Plenty of people use both. You can buff foundation with a brush, then go over it lightly with a damp sponge if it looks heavy.
How to Spot a Well-Made Tool
You can't always touch a brush before buying, especially online. But there are signs to look for either way.
The ferrule and glue
The ferrule is the metal tube that holds the bristles to the handle. It should feel snug, with no wiggle. On cheaper brushes, the ferrule can loosen over time, especially if water gets inside. Once it wobbles, the brush starts falling apart.
If you're in a store, gently twist the handle and ferrule in opposite directions. It shouldn't budge.
Shedding
Run your fingers through the bristles a few times. A couple of loose hairs at first can happen. A small pile is a bad sign. Online, read reviews and look for patterns. One person complaining about shedding might be bad luck. Twenty people saying the same thing is a pattern.
Bristle density and shape
Press the brush against the back of your hand. Does it bounce back into shape? Does it feel scratchy? A good brush holds its shape and feels soft but not floppy.
The handle
This sounds silly, but handle length matters. Long handles look pretty, but they can be awkward in a small bathroom or a travel bag. Shorter handles give you more control up close. Medium-length brushes are a good fit for daily use.
Quick side note: if you're still figuring out the skin side of things before makeup, our free AM-PM Routine Chart for Skincare Beginners is a simple way to get a morning and evening order sorted, and you can grab it from the sign-up box on this page.
Makeup Brush Set or Single Brushes?
A professional makeup brush set looks like a great deal. Twelve brushes for the price of three! But here's what I've learned.
When the best makeup brush set is a small one
- You're starting from zero and want a bit of everything to try.
- The set is small (five to eight pieces) and you'd use most of them.
- You want a gift for someone who's just getting into makeup.
When singles are smarter
If you already know your routine, buying individual brushes usually means better quality for the tools you use most. A set often has a few great brushes and a few filler ones. You end up paying for brushes that sit in the case.
A real example
A first big set can easily come with a dozen or more brushes. Two years later, I'd worn out four of them and the other eleven looked brand new. That told me everything. Now I replace my favorites one at a time and skip the extras.
What to check in a set description
Look for a list of every brush in the set and what it's for. If the seller just says "complete set" with a photo and no details, that's a little vague for my taste. Also check whether it includes a makeup brush bag or roll, and whether it's actually useful or just packaging.
Cleaning Your Brushes and Sponges
This is the part nobody loves. But clean tools apply makeup more smoothly and last longer. Dirty brushes get stiff, clumpy, and don't blend well.
How often
There's no strict rule, because it depends on how much you use them. As a habit, I wash foundation and concealer brushes and sponges more often than eyeshadow and powder brushes, since liquid products build up faster. Many brands include care advice on the packaging or product page, so check that for your specific tools. If you have sensitive or acne-prone skin and you're unsure how often to clean things, a dermatologist can give you advice that fits your skin.
A simple washing method
- Wet the bristles with lukewarm water, pointing the brush downward so water doesn't run into the ferrule.
- Add a small amount of gentle soap or brush cleanser to your palm.
- Swirl the brush in your palm until the suds look clean.
- Rinse, still pointing down, until the water runs clear.
- Squeeze out extra water gently with a towel and reshape the bristles.
Drying matters more than washing
Never dry brushes standing upright in a cup while wet. Water runs down into the ferrule and loosens the glue. Lay them flat on a towel near the edge of a counter, or hang them bristles down if you have a holder for that. This one habit has saved more of my brushes than anything else.
Sponges
Wet the sponge, add a little soap, and squeeze it over and over under running water until it runs clear. Let it air-dry fully somewhere with airflow. Don't seal a damp sponge in a closed container. A damp sponge packed away after a weekend trip can go bad, and it should go straight in the trash.
Storing Tools and Choosing Travel Makeup Brushes
At home
A makeup brush holder, or just a cup or jar, works fine for dry brushes, bristles up. Just keep it away from the shower if you can, since steam isn't great for them. If dust is a problem in your space, a lidded container or a drawer helps.
On the go
A makeup brush case or roll protects bristles from getting bent in a bag. A roll with separate slots is a good choice so brushes don't rub together. Some people use a simple zip pouch with a cardboard tube around their fluffy brushes, which works surprisingly well.
Mini and travel-size brushes
Travel makeup brushes are handy, but they're often not as nice as full-size ones. You can usually just pack your regular favorites. If space is tight, a mini dual-ended brush can cover two jobs.
When to Replace Your Tools
Tools don't last forever, even the nice ones.
Signs a brush is done
- It sheds a lot, even after washing.
- The bristles have splayed out and won't go back into shape.
- The ferrule is loose or the handle has cracked.
- It feels scratchy when it used to feel soft.
- It smells off even after a good wash.
Sponges wear out faster
Sponges break down much sooner than brushes. Watch for tears, crumbling edges, stains that won't wash out, or any odd smell. When in doubt, replace it. They're one of the cheaper tools in your kit, so I don't try to stretch mine.
Tweezers and curlers
If tweezers stop gripping cleanly, or the rubber pad on your lash curler gets worn or cracked, it's time for a change. Many curlers come with a replacement pad, which is worth checking for when you buy.
Common Mistakes
These mistakes are very common, so there's no judgment here.
Buying the biggest set available
More brushes doesn't mean better makeup. It usually means more to wash and more clutter. Start small, perhaps with a compact Real Techniques style set.
Drying brushes upright
This is the quiet killer of brushes. Water sits in the ferrule, the glue weakens, and suddenly bristles are falling out. Dry flat or bristles down.
Using one brush for everything
Using your foundation brush for blush and then powder muddies colors and makes blending harder. You don't need a ton of brushes, but you do need a few different ones.
Judging only by looks
Rose gold handles and marble patterns are pretty. They tell you nothing about how the bristles feel or whether the ferrule is secure. A brush can look gorgeous and still perform terribly, so judge it by bristle quality and shape, not looks.
Skipping the product page details
The seller's page should tell you the bristle material, what each brush is meant for, and how to care for it. If those details are missing, ask the seller or look for another option.
Holding on to old sponges
It's an understandable mistake. It still sort of works. But a worn-out sponge doesn't blend well, and it's hard to get truly clean. Let it go.
Brushes and tools worth a look
These are well-known brands that make the kinds of tools covered above. Think of them as starting points for your own comparison, not a ranking.
Real Techniques
A good fit for beginners who want synthetic brushes in small, easy-to-understand sets. Check the list of included brushes and make sure you'd use most of them.
EcoTools
Suits shoppers who want simple, budget-friendly brushes and sponges. Look at the product page for bristle material and care notes before you buy.
e.l.f. Cosmetics
Works for people who want to try a shape or two without spending much. Read reviews for patterns about shedding and handle sturdiness.
Sigma Beauty
Known for brushes sold individually, which suits someone who already knows their routine. Check the shape and size descriptions so you pick the right one for the job.
Morphe
Offers both singles and larger sets, so it can suit people who like to browse many shapes. With any big set, count how many brushes you would really use.
beautyblender
A well-known name in makeup sponges, good for a soft, damp finish with foundation and concealer. Remember that sponges need frequent washing and replacing, whatever the brand.
Tweezerman
A familiar choice for tweezers and lash curlers, for people who want precise tools. Check that the tip closes evenly and, for curlers, that the curve suits your eye shape.
Check current plans and prices on each brand's own site before you buy.
FAQ
Do expensive brushes really make a difference?
Sometimes, but price alone isn't a guarantee. Some affordable brushes are soft and sturdy, and some pricey ones shed. Check the build quality, read reviews for patterns, and look at the materials listed on the seller's page.
Can I just use my fingers instead of tools?
Yes, especially for cream blush, concealer, and some tinted moisturizers. Fingers warm up the product and can give a natural finish. Brushes and sponges help more with powders and with getting an even layer across your whole face.
What's the one tool I should buy first?
If you wear foundation, I'd start with a dense buffing brush. If you mostly wear powder or bronzer, a soft fluffy powder brush gets the most use. Build from there based on what you actually wear.
Is it okay to share brushes with friends?
Sharing tools that touch your face or eyes isn't a great habit, since it can spread whatever's on the skin. If you do share, wash them first. If you have specific skin or eye concerns, check with a doctor or dermatologist.
If you take one thing from this guide, let it be this: buy fewer tools, pick them carefully, and dry them properly. That alone will make your kit easier to use and help it last. Your next step is easy. Grab the free AM-PM Routine Chart for Skincare Beginners from the sign-up box on this page, so your skin is prepped and ready before the brushes even come out. Then take a look at your own brush cup and see which tools you actually reach for. That's your starting list.
1. List the tools you use
Buy for your own routine.
2. Compare size and shape
Think about how you use them.
3. Check materials and care
Read the care notes.
4. Look at sets versus singles
Compare what is included.
5. Plan storage with a makeup brush case
A case keeps tools clean.
6. Read the seller's page
Details can change.
Ready to look?
This is an affiliate link. Prices and terms change, so check the seller's page. General information only, not medical advice.
Want a printable to keep track while you work? Get our free am-pm routine chart for skincare beginners.